Your first model in 15 minutes
You will teach a board to tell two gestures apart: waving your hand, and holding still. You record the examples with your phone, train a model, and download C source built for your board. Then you build and flash it with that board's own tools.
The product is designed so that the steps up to the download take about 15 minutes, most of it recording. That is a design target and has not been measured with real users. The time you need for building and flashing depends on your board and on what you already have installed.
Before you start
- A computer with a web browser, and a phone with a web browser and a camera. You install no app.
- The phone must be able to reach upstratus. The QR code opens a web page on the phone.
- For the last step: one of the six supported boards, a USB cable, and the board's own build tools. upstratus does not flash boards for you yet.
1. Create an account
upstratus is in alpha, so an account needs an access key (it looks like ALPHA-XXXX-XXXX). Ask for
one from Request an invitation on the sign-up page; it is emailed to the address it was issued for. If an
organisation has invited you, its invitation replaces the key (see
Invite people and manage your organisation).
Open Start free (or go to /signup/) and enter the key, then choose Continue. The rest of the form
appears. You then confirm three things:
- Your email. Either choose Continue with Google, which has already confirmed the address, or enter an Email and a Password and then the six-digit code we email you. The rules for the password are shown under the field before you submit. The email must be the address the key was issued for.
- Your mobile number. Every account proves a phone number with a text message. A number can belong to one account.
- The terms. Tick the box to accept the Terms and Privacy Policy.
You can name your organisation now or leave it. Choose Create account.
If an account you had before this requirement signs in, it is held on a Finish your account page until it has a confirmed email and a verified mobile number. Nothing else works until both are done.
You are signed in and taken to an example project, Wave detector (example). Its recordings are made-up example data, so every step already has something to show. A card offers a short tour: choose Show me around to see the six steps, or No thanks. You can come back to the example at any time from All projects.
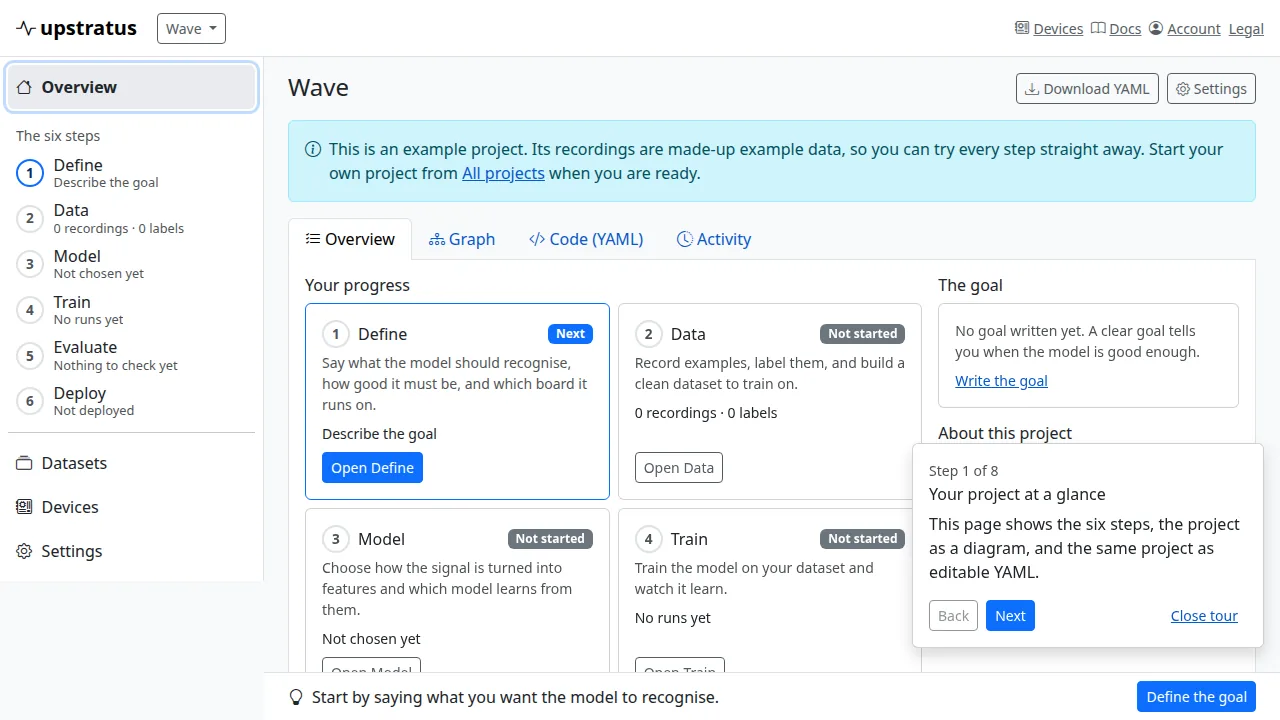
2. Create a project
Open the project menu at the top and choose New project (or All projects, then New project). Type a Project name such as wave detector, choose Motion under What will the model listen to?, then choose Create project. Motion records your phone's motion sensors.
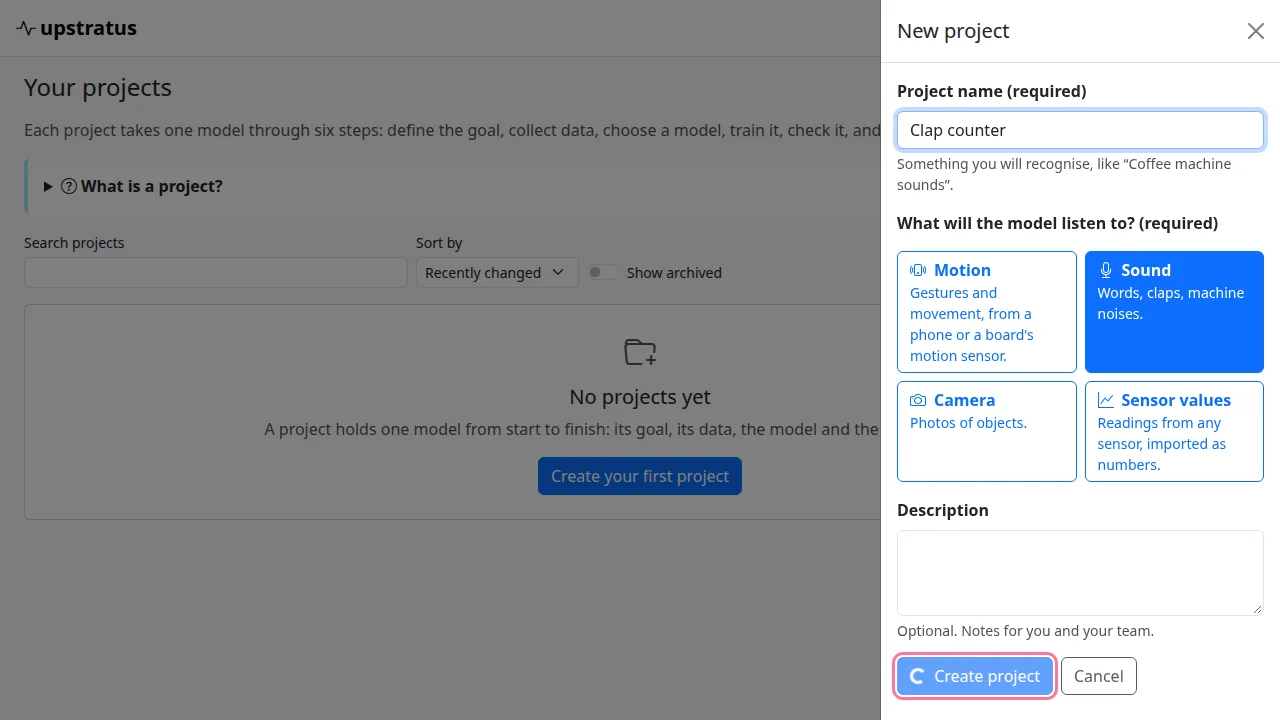
The new project opens on its overview. The steps are listed on the left; choose Data, then Record with a phone.
The project's Collect screen shows a QR code.
3. Record examples with your phone
- Scan the QR code with your phone's camera and open the link. The phone shows Connect your phone.
- Choose Allow motion access and accept the browser's permission prompt. Nothing leaves the phone until you press Record.
- Type
wavein Label. Choose Record, wave the phone for a second or two, then choose Stop. The recording uploads by itself. If the connection drops, it is kept on the phone and sent when the connection is back. - Record
wavefive times, then change the label tostilland record five takes of holding the phone still. - On the computer, choose New QR and scan the new code. Record five more of each label.
Why the second QR code: each scan is one session. upstratus keeps a whole session on one side of its accuracy check. With only one session per label it cannot tell you how accurate the model is, so it does not offer a classifier until every label has at least 5 recordings from 2 or more sessions.
4. Check your recordings
On the computer, choose Label your samples →. Every recording is listed with its label. Fix a wrong label or delete a bad take here. Then choose Design your recipe →.
5. Train
The Design screen opens with the features and model that suit a motion project already selected. Leave them as they are and choose Train. Then choose See its status →.
The status page shows Pending until a training worker picks the job up, then Running with a live log, then the report. The report gives the recall for each label and which labels the model confused. It compares the full-precision model with the 8-bit model that will run on the board. If you recorded too little data to measure accuracy, the report says so and shows no accuracy figure.
6. Package it for your board
Go back to Design and choose View past versions →. On the version you just trained, choose your board in the board list. The list says if a board needs administrator access or a button press to program. Choose Package for board. When the package is ready, choose Download SDK.
You get a zip of C source. It contains the model (us_model.h, its weights and graph), the kernels the
model needs for your board, the label names (us_class_labels.h) and a NOTICE file. For the Arduino
Nano 33 BLE and the ESP32-S3 it also contains an Arduino example sketch under examples/arduino/.
7. Build and flash it with your own tools
Your firmware calls us_model_predict() with one window of input and gets back a label id. Look up the
name in US_CLASS_LABELS. Add the zip's files to your project and build it with your board's usual
toolchain. The toolchain for each board is listed in Supported boards.
What the package does not do yet
- It does not flash the board. You flash it the usual way for your board, for example uploading
from the Arduino IDE or copying a
.uf2or.binfile onto the board's USB drive. - It does not include the signal-processing step.
us_model_predict()takes a window of features that has already been computed and quantised to 8 bits. Your firmware has to compute those features from the sensor. The Arduino example runs the model once on placeholder input. It shows that the code builds and runs on your board. It does not classify real sensor data.
Read the setup notes for your board before plugging it in. Some boards need a button held the first time, and one needs a one-time administrator step on Linux.
If something goes wrong
| What you see | What it means | What to do |
|---|---|---|
| The phone says the QR code has expired or is no longer valid | A code lasts 15 minutes, and Disconnect ends it | Choose New QR on the computer and scan again |
| The phone's permission prompt was refused | The browser blocked the sensor | Allow motion access in the browser's site settings, then reload the page |
| Design says Nothing is recorded in this project yet | The project has no recordings | Choose Back to Collect and record some data |
| Design says Record a few more first and lists reasons | At least one label is below the minimum for every model | Choose Back to Collect and record what the list names |
| A model on Design is greyed out with a reason | That model's own data minimum is not met yet | Record what the reason names, or choose a model that is offered |
| Training stays Pending | No training worker has picked the job up yet | Wait and choose Refresh |
| Train is refused because your allowance is used up | Your plan's GPU minutes for this period are spent | See Plan and billing under Account |
| Packaging fails | The package build failed | Choose Retry. Your board choice is kept |
Every error the API returns has a code. Error codes lists them all with what to do.
Next: Supported boards has the setup each board needs before you flash it.